
Hanging pictures might seem easy at first glance. But many people end up with crooked frames, holes in the wrong spots, or artwork that just doesn’t look right.
Getting it perfect takes a bit of planning and the right approach.
This guide walks you through each step to hang pictures like a pro. You’ll learn how to measure correctly, choose the right hardware, and avoid common mistakes.
Whether you’re decorating your first apartment or updating your living room, these tips will help you create a gallery wall you’ll love.
By the end, you’ll have the confidence to hang any picture frame securely and beautifully
What You’ll Need Before You Start
Gather these tools before you begin. Having everything ready saves time and prevents trips to the hardware store mid-project.
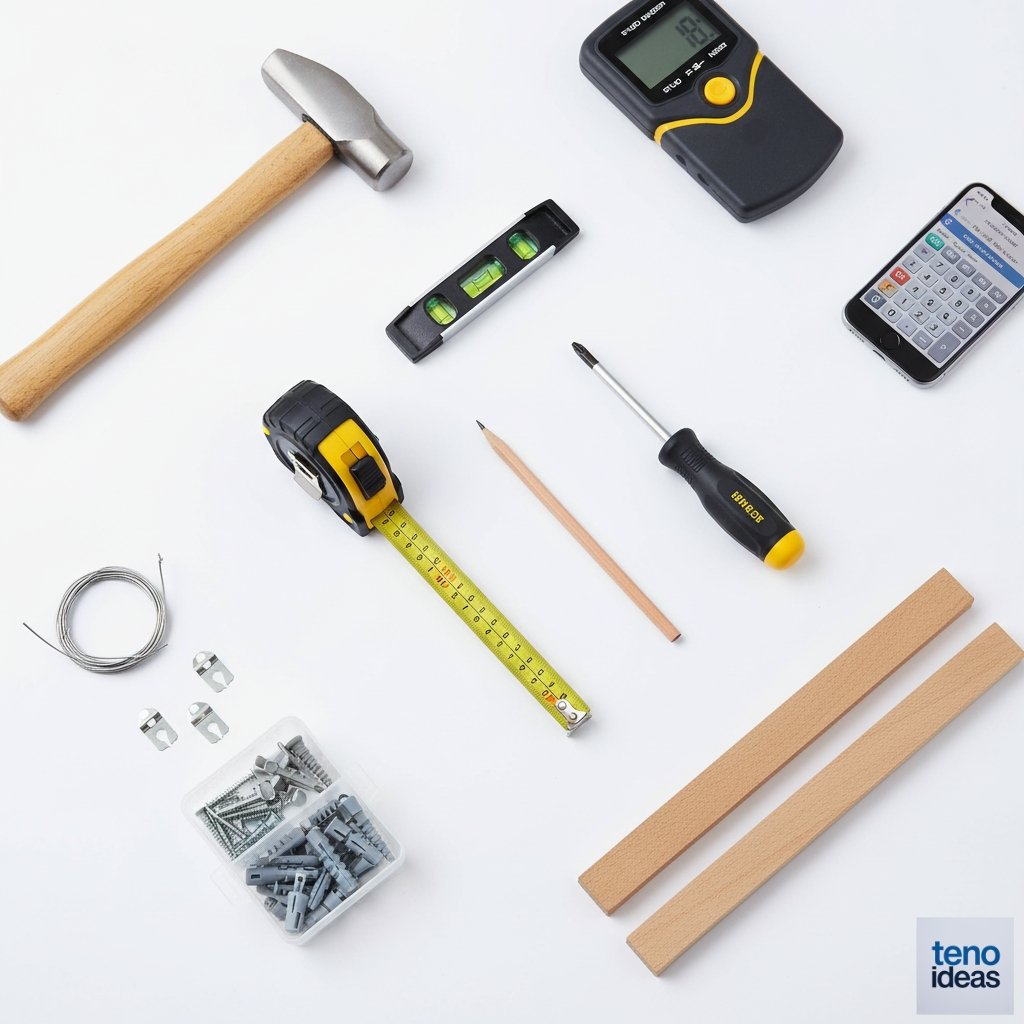
Essential Tools:
- Measuring tape
- Pencil (for marking)
- Level (small bubble level works fine)
- Hammer
- Screwdriver
- Stud finder (for heavy frames)
- Calculator or smartphone
Hardware Options:
- Picture hanging wire or sawtooth hangers
- Wall anchors (for drywall)
- Screws or nails
- Picture ledge strips (for multiple frames)
Step 1: Choose Your Wall Location
Pick the right spot before you start measuring. This decision affects how your room feels and functions.
Height Guidelines
Most pictures look best when the center sits 57-60 inches from the floor. This puts artwork at average eye level for most people.
Consider Your Furniture
If hanging above a sofa or console table, leave 6-8 inches between the furniture top and the frame bottom. This creates visual balance without making the picture seem to float.
Check for Obstacles
Make sure doors, windows, or light switches won’t interfere with your chosen spot. Walk around the room to see how the placement looks from different angles.
Step 2: Measure Your Picture Frame
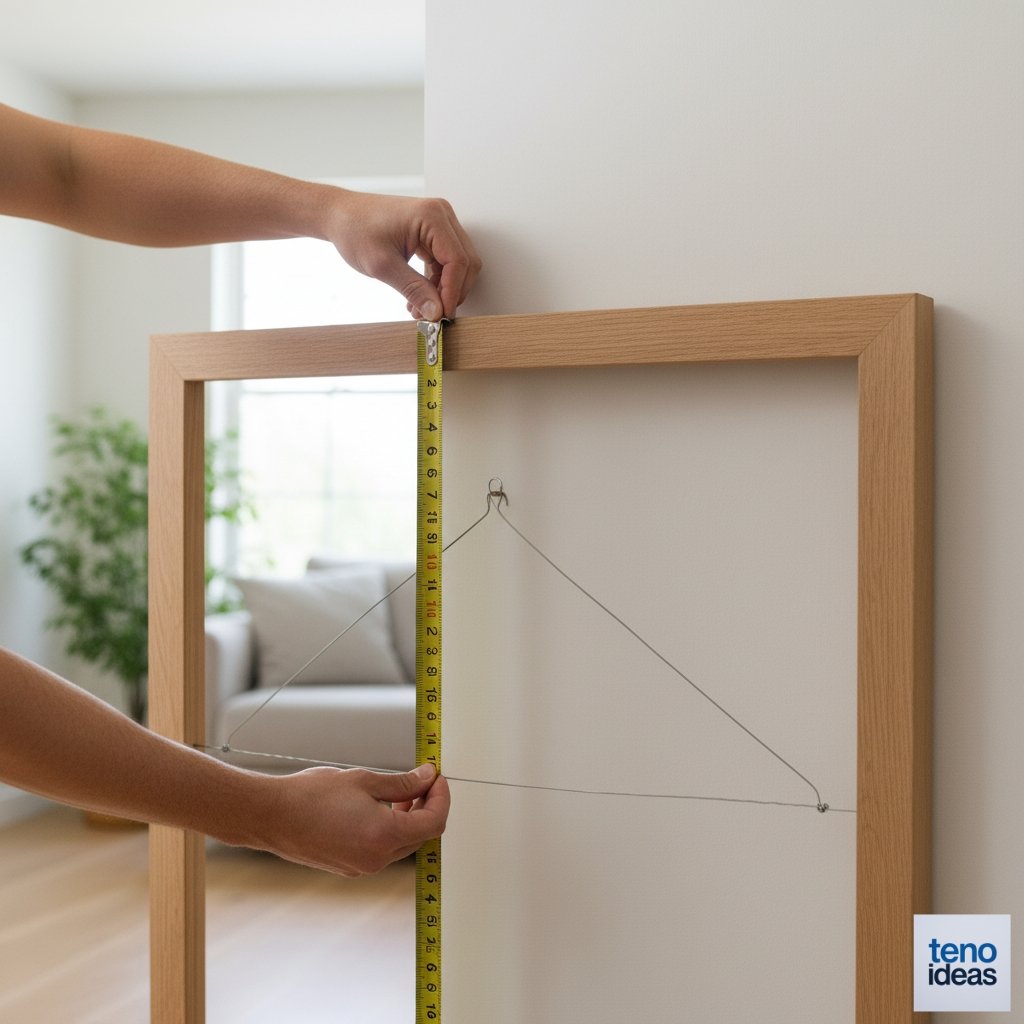
Turn your frame over to see what type of hanging system it has. This determines your next steps.
For Wire Hangers:
Pull the wire up gently to create a triangle shape. Measure from the top of the frame to the highest point of the wire. Write this number down – you’ll need it for positioning.
For Sawtooth or Ring Hangers
Measure from the top of the frame to the hanger location. This distance is usually smaller than wire measurements.
Mark the Frame Width
Measure the total width of your frame. You’ll use this to center it properly on the wall.
Step 3: Find the Perfect Wall Position
Now you’ll mark where your picture will hang. Take your time with this step – accuracy here prevents do-overs.
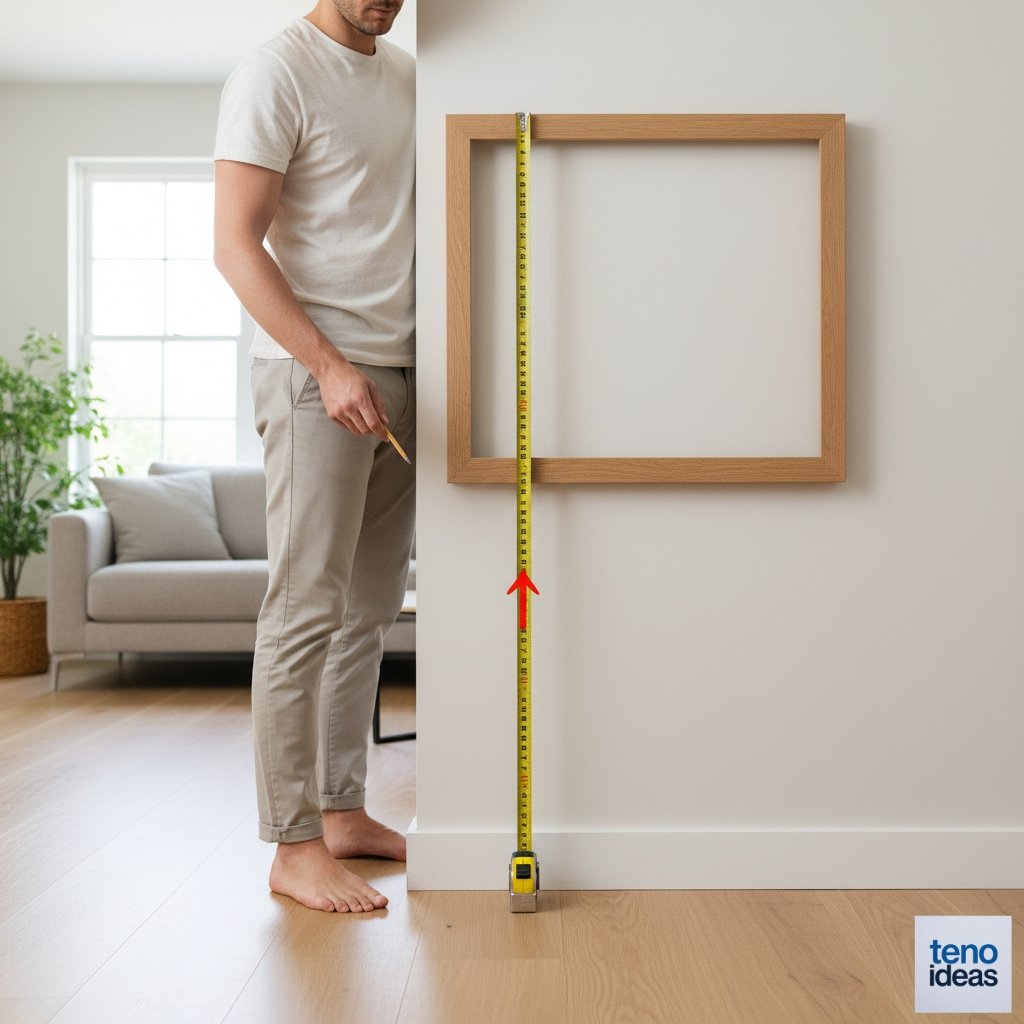
Calculate the Hook Height
Start with your desired center height (57-60 inches). Add half your frame height. Then subtract the measurement from Step 2. This gives you the exact hook height.
Example: If you want the center at 58 inches, your frame is 16 inches tall, and the wire hangs 4 inches down: 58 + 8 – 4 = 62 inches from floor to hook
Mark the Center Point
Use your measuring tape to find the center of your chosen wall space. Make a light pencil mark at the hook height you calculated.
Step 4: Check for Wall Studs
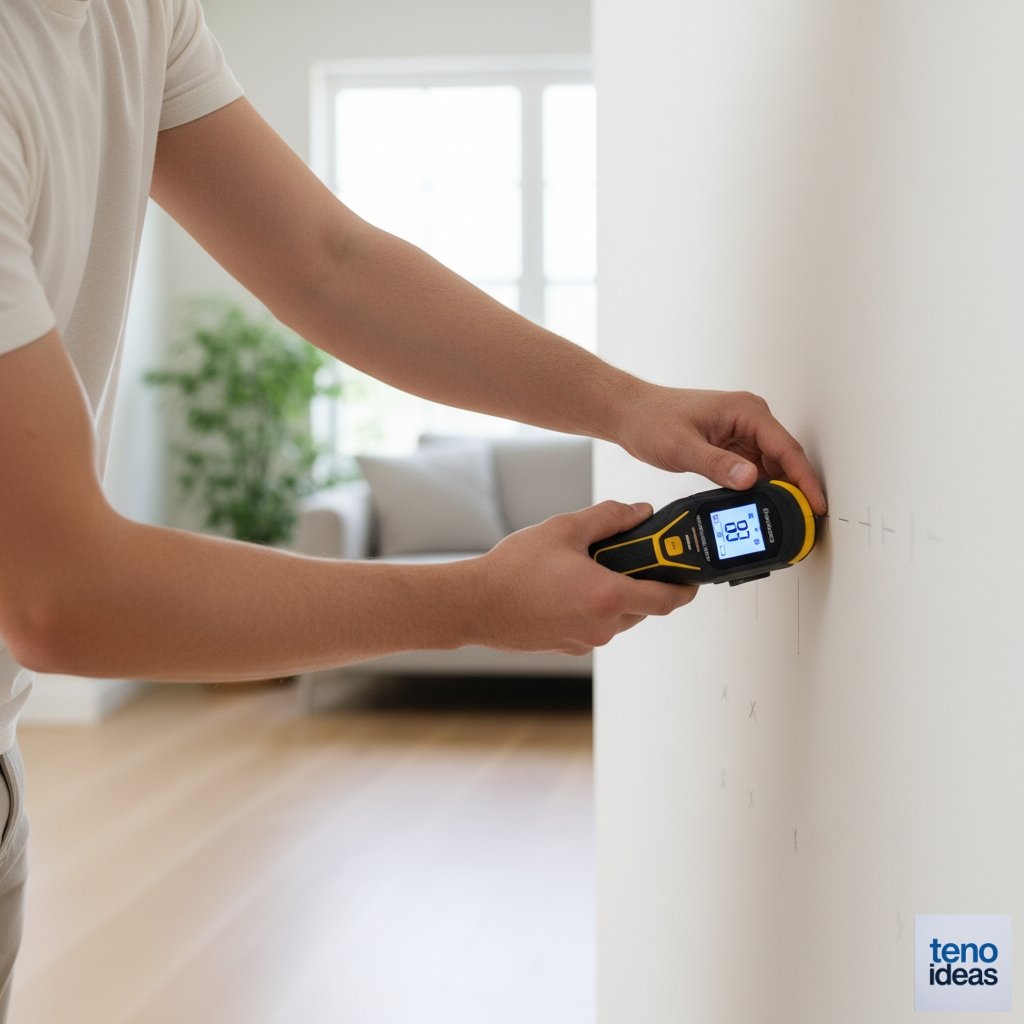
Heavy pictures need extra support. A stud finder helps you locate the solid wood framing behind your drywall.
When to Use Studs
Pictures over 20 pounds should hang from studs when possible. This includes large frames, heavy artwork, or anything with glass.
How to Find Studs
Run your stud finder along the wall near your marked spot. Most studs are 16 or 24 inches apart. Mark any stud locations with light pencil marks.
If No Stud is Available
Don’t worry if your perfect spot has no stud. Heavy-duty wall anchors can support most pictures safely in drywall.
Step 5: Choose the Right Hardware
Your wall type and picture weight determine the best hanging method. Using the wrong hardware leads to fallen frames and wall damage.
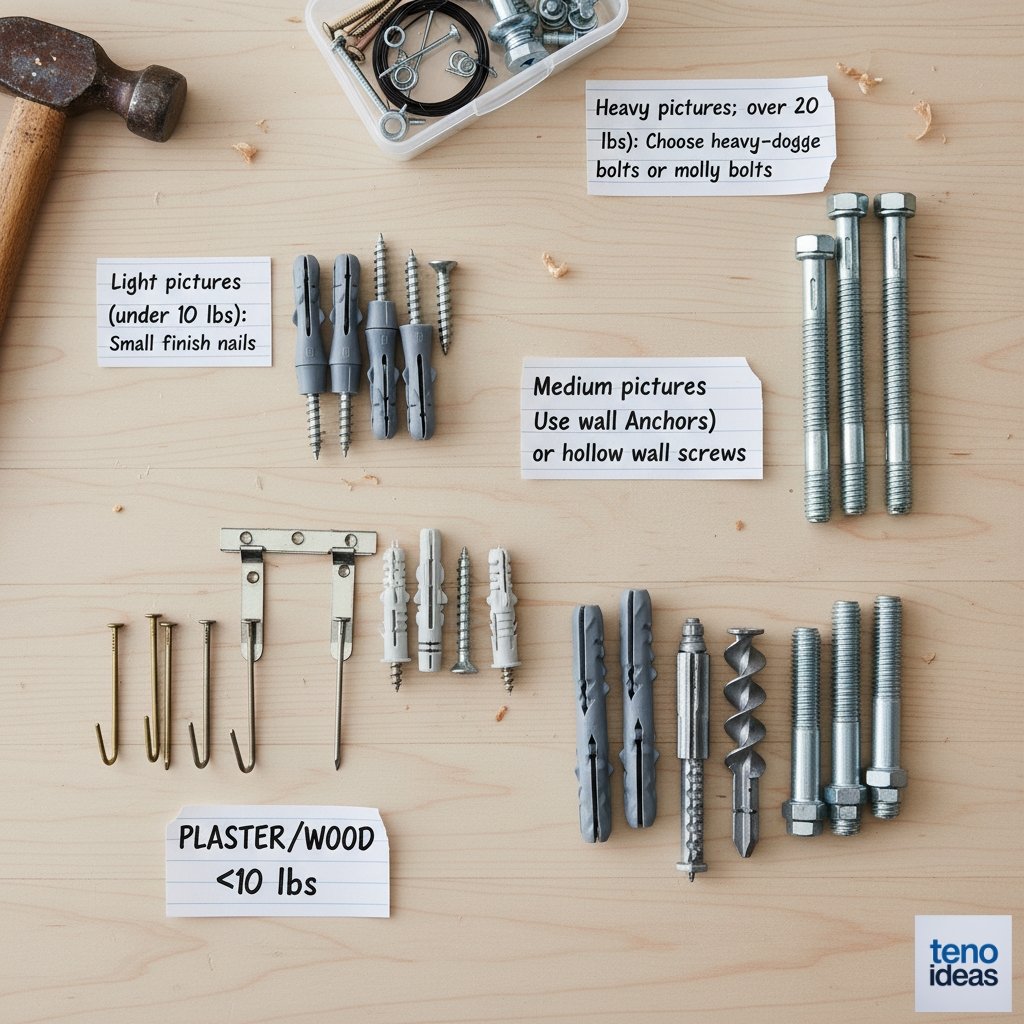
For Drywall Without Stud
- Light pictures (under 10 lbs): Small finish nails work fine
- Medium pictures (10-20 lbs): Use wall anchors or hollow wall screws
- Heavy pictures (over 20 lbs): Choose heavy-duty toggle bolts or molly bolts
For Stud Mounting
Wood screws drive directly into studs. Use 2-3 inch screws for secure mounting. Pre-drill small pilot holes to prevent wood splitting.
For Other Wall Types
Brick or concrete needs masonry anchors. Plaster walls often require special hollow wall fasteners.
Step 6: Install Your Wall Hook
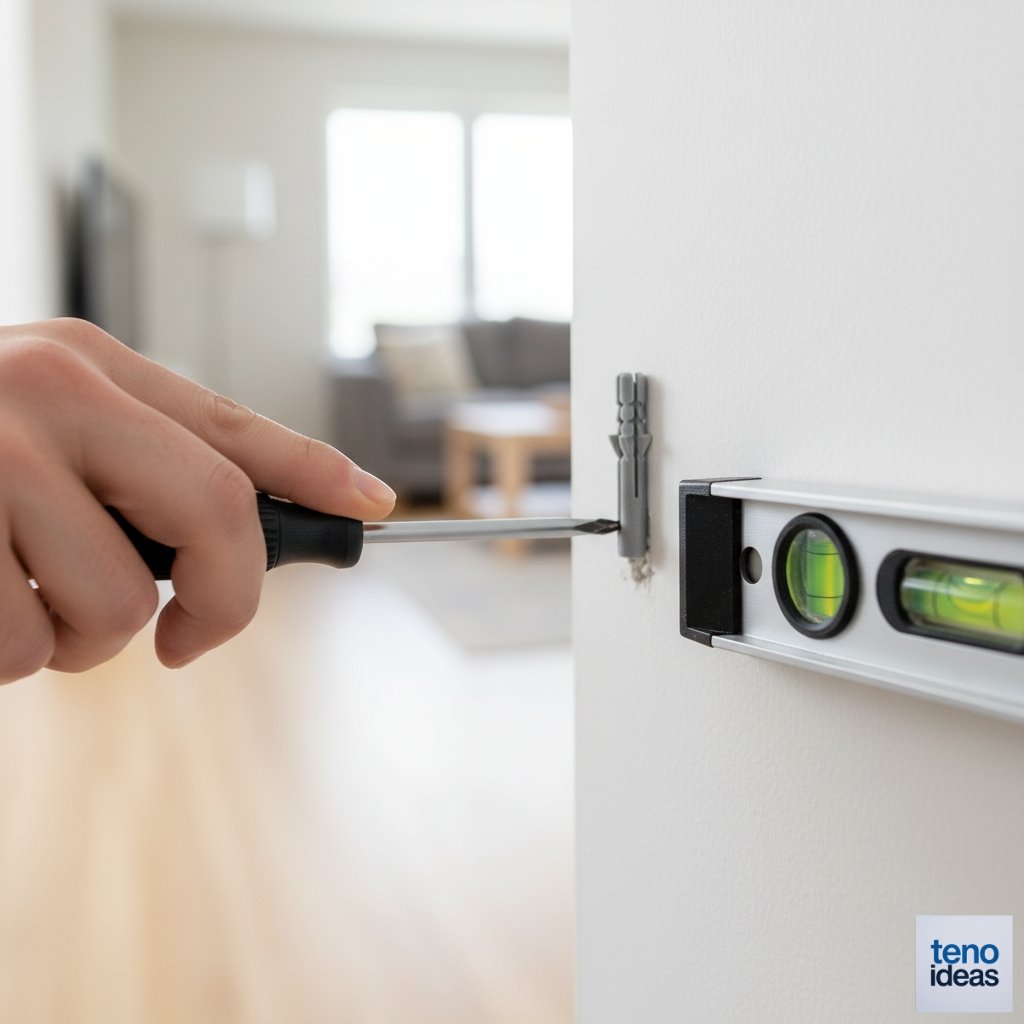
With your spot marked and hardware chosen, it’s time to create the hanging point. Work carefully to avoid mistakes.
Pre-Drill if Needed
Hard walls or large screws benefit from pilot holes. Use a drill bit slightly smaller than your screw diameter.
Install the Hardware
- For nails: Tap gently with a hammer, leaving enough exposed to hold your wire
- For screws: Drive in most of the way, leaving about 1/4 inch sticking out
- For anchors: Follow package directions for your specific type
Test the Installation
Give your installed hardware a gentle tug. It should feel solid and secure before you hang anything.
Step 7: Hang Your Picture
The moment of truth arrives. Take your time and make small adjustments as needed.
Lift and Position
Hold your picture by the sides, not the wire. Gently place the wire or hanger over your installed hook. Let the frame settle naturally.
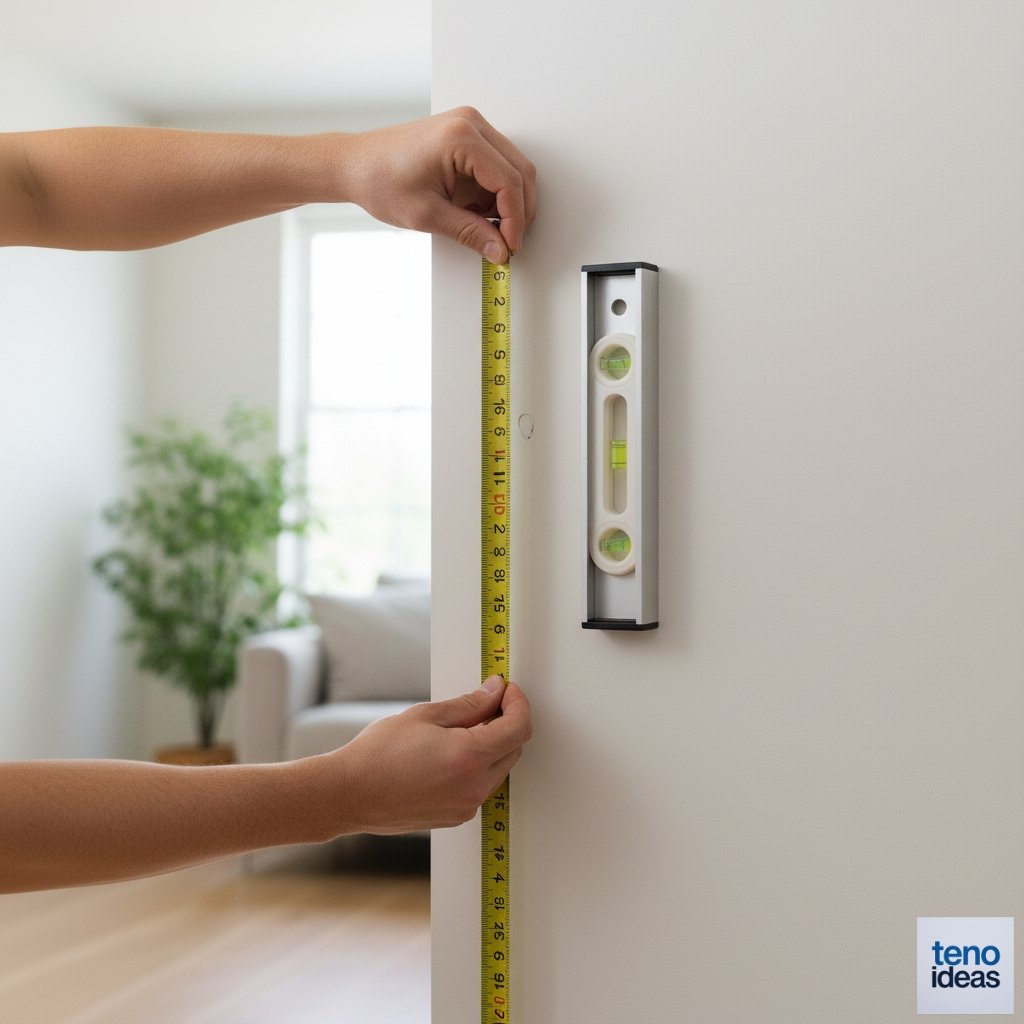
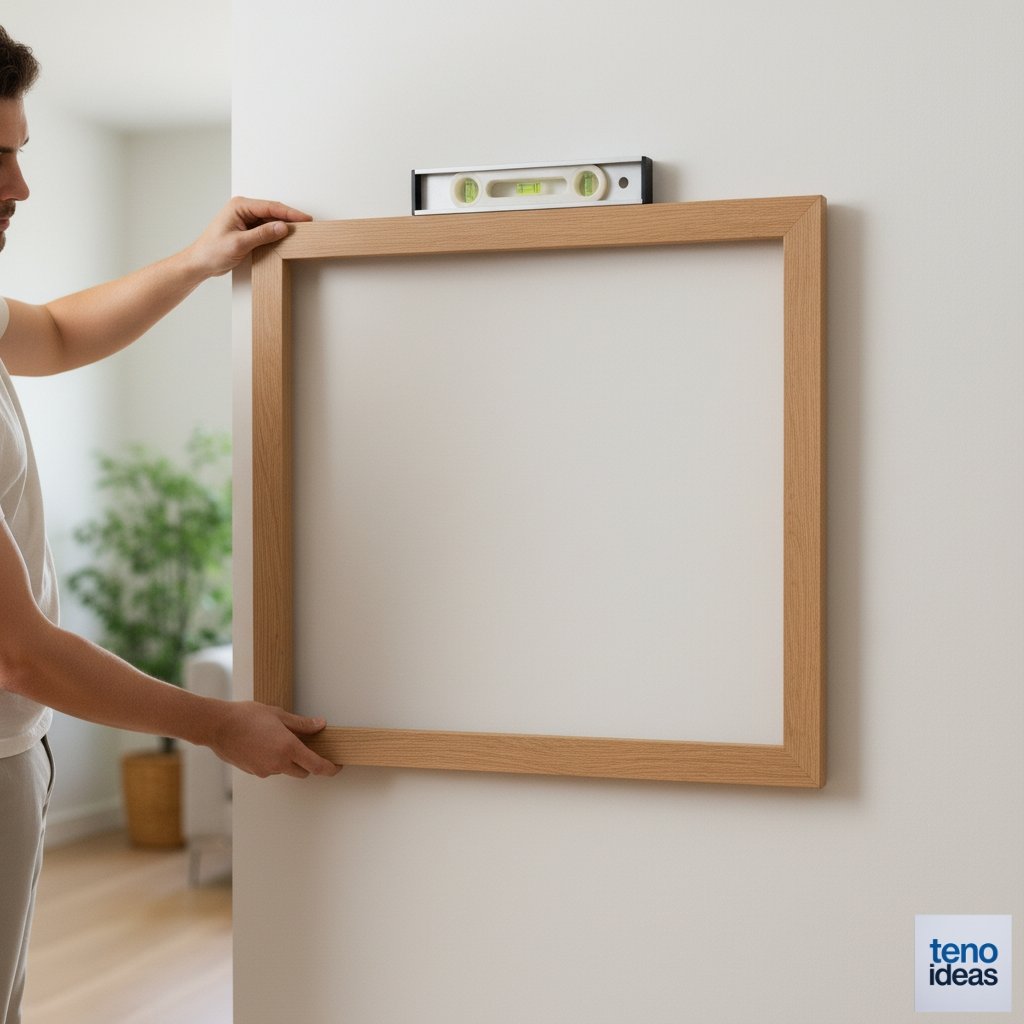
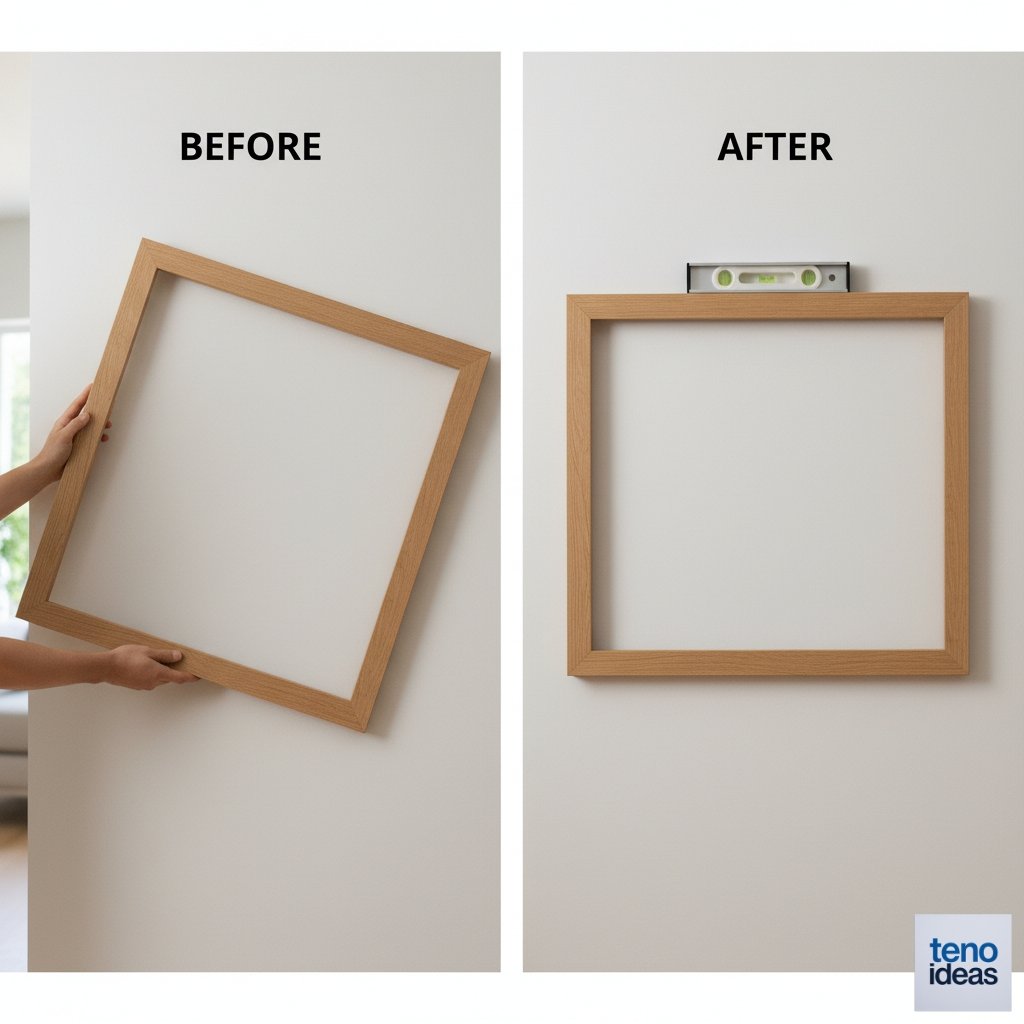
Check the Level
Place your bubble level on top of the frame. Most frames have flat tops that work well for this. Make small adjustments until the bubble centers.
Step Back and Assess
Move away from the wall to see the full effect. Check that the picture looks centered and properly positioned with your furniture and room layout.
Step 8: Make Final Adjustments
Small tweaks often make a big difference in how professional your hanging job looks.
Fine-Tune the Position
If something looks off, don’t hesitate to adjust. You might need to move the hook slightly or rotate the frame to get it perfect.
Clean Up Your Marks
Erase any visible pencil marks with a clean eraser. Be gentle to avoid damaging your wall paint.
Secure Loose Wire
If you used picture wire, make sure it’s not visible from the front. Sometimes you can adjust the wire position by gently moving the frame.
Hanging Multiple Pictures
Creating a gallery wall or hanging several pictures together requires extra planning but follows similar principles.
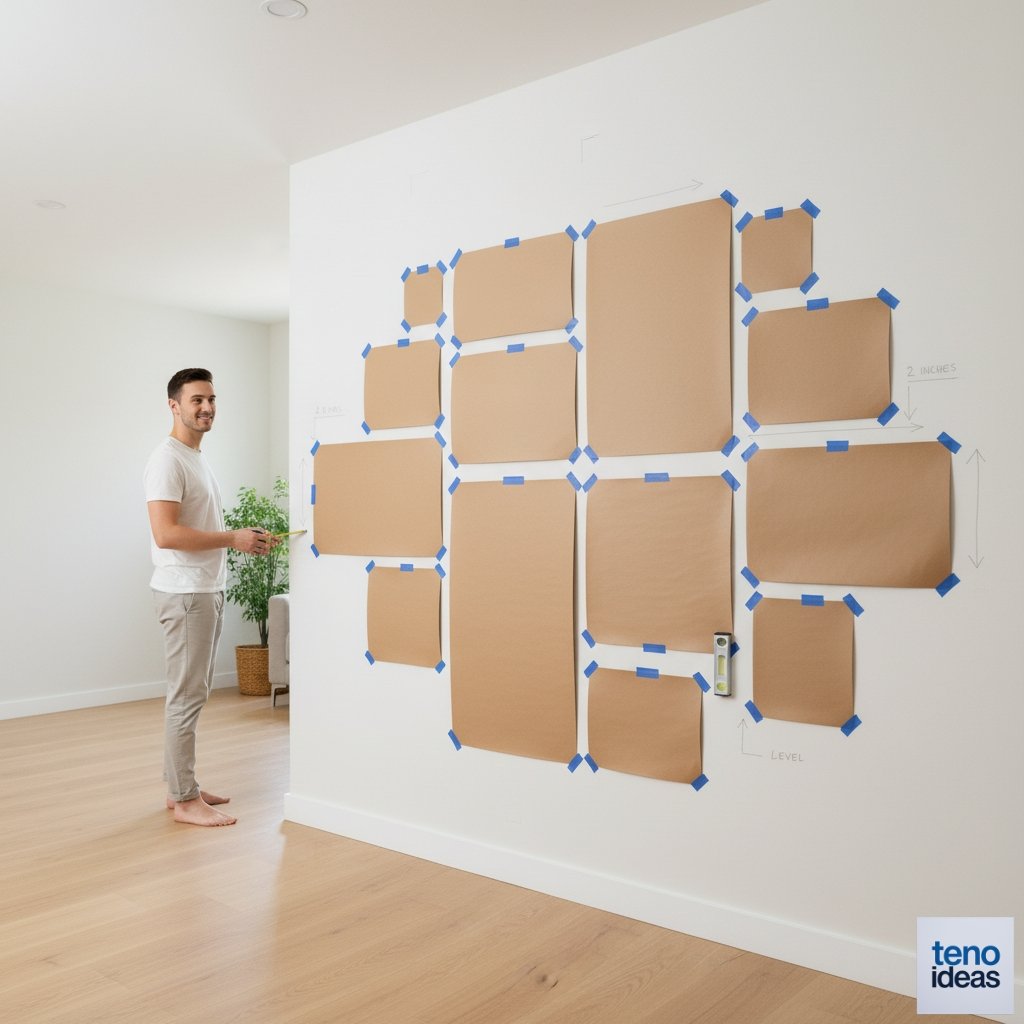
Plan Your Layout
Cut paper templates matching your frame sizes. Tape them to the wall to test arrangements before making any holes.
Maintain Consistent Spacing
Keep 2-3 inches between frames for a cohesive look. Measure between frames as you hang each one.
Use a Central Anchor
Pick one main picture as your starting point. Hang it first, then work outward to create your grouping.
Troubleshooting Common Problems
Even careful planning sometimes leads to issues. Here’s how to fix the most common hanging problems.
Picture Keeps Sliding: Your wire might be too loose, or the hook isn’t centered. Adjust the wire tension or move the hook slightly.
Frame Tilts to One Side: This usually means the wire attachment points aren’t level on the frame back. You can often fix this by adjusting where the wire sits on the hook.
Picture Seems Too High or Low: Trust your eye over strict measurements. If it looks wrong, it probably is. Don’t be afraid to move the hook and rehang.
Taking Care of Your Hung Pictures
Proper hanging is just the start. A few maintenance tips keep your pictures looking great long-term.
Regular Dusting: Dust frames monthly with a microfiber cloth. This prevents buildup that can damage both frame and artwork.
Check Hardware Annually: Give your hanging hardware a gentle test once a year. Wall anchors and screws can loosen over time.
Monitor for Settling: Houses settle and shift. Check that your pictures remain level, especially after seasonal changes or minor earthquakes.
Your Pictures Are Ready to Enjoy
You now have the skills to hang pictures with confidence. The key is taking time to measure accurately and choose appropriate hardware for your wall type and picture weight.
Remember that practice makes perfect. Your first hanging job might take longer, but each picture gets easier and faster.
Don’t stress about getting everything perfect immediately – you can always make small adjustments later.
Start with one favorite piece and build your wall display over time. Soon you’ll have a home filled with properly hung artwork that reflects your personal style and makes every room more welcoming.