If you are considering ways to make your team more productive, cut unnecessary paper clutter, and generally streamline and improve your company’s workflow, you should consider using electronic signatures. You can create and sign pdf files online, email them to your partners, and receive your signed copy in a few minutes. Learn how you can use SignNow for this.
SignNow Interface Overview
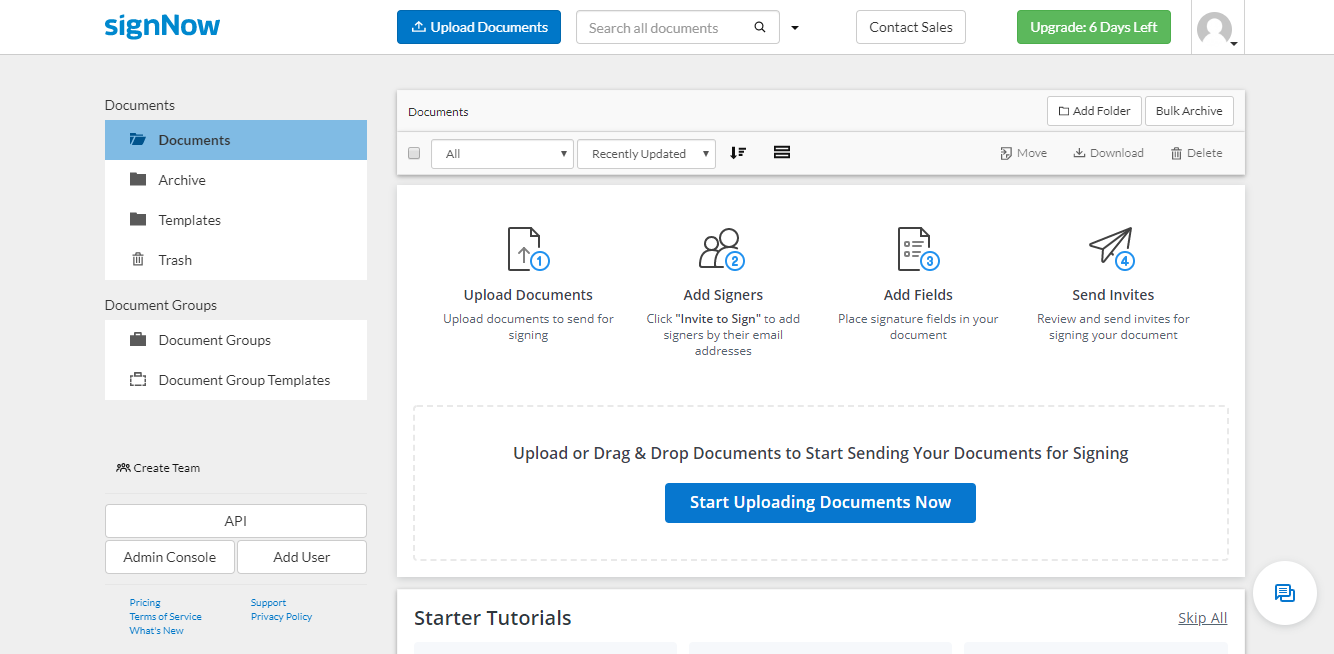
The SignNow interface is intuitive and straightforward. On the left, the menu includes Documents, Document Groups, and API sections.
The Documents section has the Documents, Archive, Templates, and Trash folders. If you prefer a more advanced organization, you can create as many subfolders as you need by clicking on the Add Folder button in the top right corner. To upload, just drag and drop a file or click Upload Documents. You can access the file from your Documents. Simply click on it to open the editor.
In case you need to send bundles of documents to be signed, you will create them in Document Groups. Once you have all the documents in a bundle ready, you can either send it directly to a signer’s mailbox or set up a system of steps if the documents need to be signed in a specific order.
Both Documents and Document Groups have the option to create templates of the existing documents. It is one of the features that make SignNow so efficient. To make a template:
Go to a folder with a document.
Click on More next to it to open a dropdown menu.
Select Make Template.
The document will then be moved to Templates. From it, you will be able to edit the document or use it to add to Document Group Templates.
And finally, the API section allows you to add and manage the eSignature feature in your apps, CRMs, websites, etc. SignNow provides you with a testing environment where you can assess how it will work for you and your team.
Edit and Send Documents for Signing
Getting from the point of uploading a document to having it signed is very easy. After you open the file, the editing process is quite intuitive:
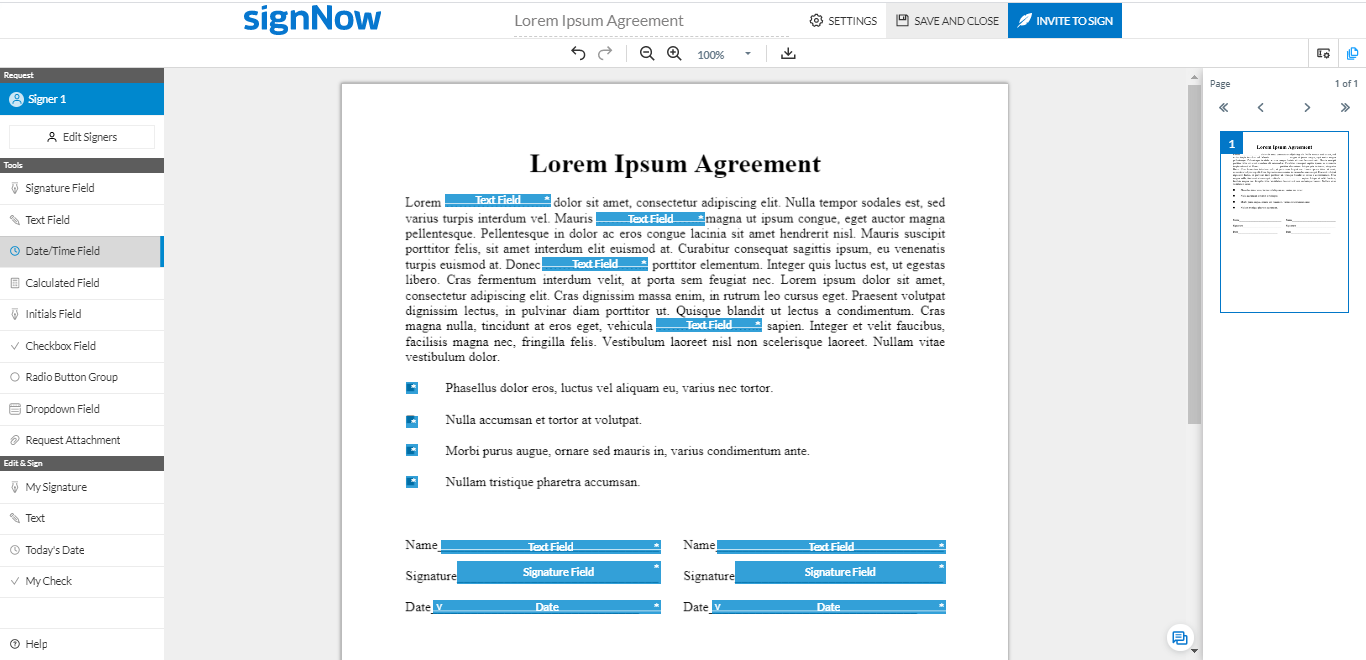
In the top right corner, find Edit Signers. Click on it to add the signers’ emails. Here you can also specify the order in which the signers will receive the document once you are ready to send it for signing.
From the menu on the left, select the field you want to add to the document. There are different fields for different types of documents. For an agreement, for example, you might need Text (signers can fill in the information), Date/Time, and Signature fields. Make sure you assign the fields to a correct signer to avoid possible issues.
Click on a place in the document where the field should be added. It is easy to drag to change its placement, resize it, and align with other fields so that the document looks neat and professional.
As soon as everything is done, you can save it and send it to signers by clicking on Invite to Sign from the editor or Documents. Another option will be to generate a signing link you can share with others by clicking on Create Signing Link.
The editing tool is very versatile. It allows you to add fields for calculations, checklists, radio button lists, or dropdown menus, which makes the process of filling in the document much faster.
Filling in the Blanks and Signing
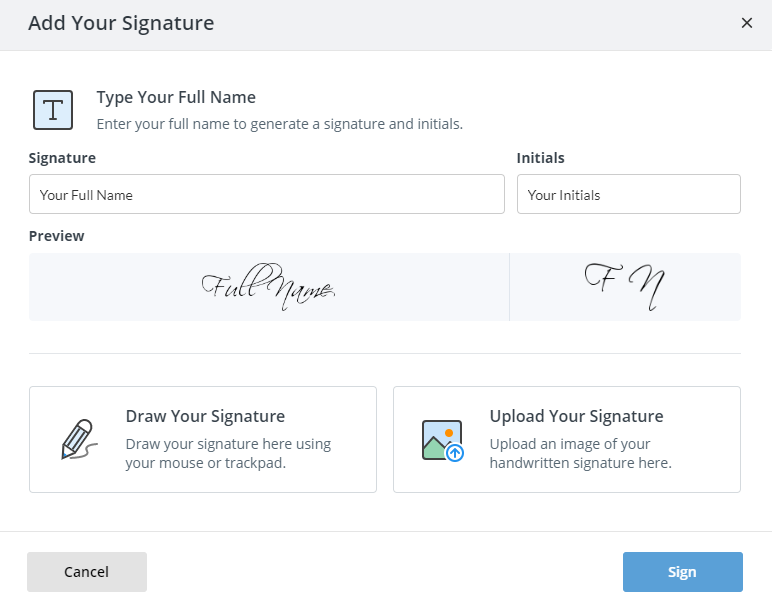
As soon as the document is sent, the signer(s) will be able to fill all the blanks, sign, and date it by clicking on the corresponding field. While it is easy to figure out what to do with the text fields or lists, the signature field will offer several options for the signers to choose from:
Type your name and edit the font (you can opt for any of the offered handwriting fonts).
Use a mouse or mouse pad to ‘draw’ your signature.
Use a photo or scan of your signature and upload it.
The next step will be to hit Sign, and the signature will be added to the corresponding field. If you are unhappy with its appearance, you can simply edit it.
The document will be signed only when all the fields are filled in and the signing is completed with a click on Done. As soon as it happens, the document will appear in your Documents with a Signed tag and an email of a signer. You will now have the option to download it, move it to a corresponding folder, merge with another document, archive it, delete it, etc. (select from the More dropdown menu).
SignNow Additional Features

Create teams
With this feature, you can easily invite people to a team. It is perfect for those who work on the same project and need to work with the same documents or templates. A team admin can view each member’s personal documents.
Integrate with your business apps
Does your company use Slack for internal communication? SignNow allows you to integrate these apps to make your workflow even more efficient. You can also integrate SignNow with Word, Office 365, G Suite, and many other business apps.
Connect to cloud storage for easy exporting
Instead of downloading documents to your hard drive, you can connect your SignNow account with any of the preferred cloud storage services and export your files there. This allows easy access from any device.
Connect with a merchant account
If you want to streamline the process of accepting payments from signers, you can connect your SignNow account with Payeezy. To be able to receive payments, you need to make sure that you enable a payment field in the advanced settings of the text field.
Final Thoughts
If you are looking for a comprehensive and secure tool to facilitate your everyday work with agreements and contracts, SignNow is one of the most convenient tools you will come across. The app and its features will not take much of your time to learn but will greatly simplify your workflow.